Wednesday, 11 December 2013
Monday, 9 December 2013
'How to Defend Against Vikings': Pre-Visualizing Scenes 2
After we had developed a fully rigged character and placed him into a fully rigged scene we were ready to go into animation and then onto the final stages of rendering. To help with the Pre-Vis we conducted a render to work from, I felt that mine needed some tweaks from the video below but I was gaining an over all complexion of what things would look like which was very satisfying. As a group we had decided to split the animation into three segments; Megan and I were to take on a relatively fifty-fifty portion of 3D animation with Jake largely compositing the animation into after effects and finishing off the animated short with those all important 2D effects which will really give it that polished finish we wanted to achieve.
Here's a sneak peek of something like what you should expect to see Wednesday for those at crit!
(By the way, just to clear up confusion certain props are to be added in 2D and they have been hidden as a reference layer in Maya before being rendered.)
'How to Defend Against Vikings': Pre-Visualizing Scenes 1
Although at this stage we won't be putting together a full pre-viz sequence for our animation, here are some of the tests I have playblasted.
Character Texture Maps
Wednesday, 4 December 2013
Animation Underway!
Today seemed to mark a day of great progress, it was the first time we have really begun to see our groups work assembled into single renders. We started work by dividing up roles for animation and working out each time frame for the each scene so that our animation completely matches the voice over which we have worked so hard to get into the perfect sync. Be prepared to see more humor from our berserker blob of a viking over the coming days!!
Fig.1
Fig.2
Fig.3
Monday, 2 December 2013
Sunday, 1 December 2013
Friday, 29 November 2013
3D Character Walk Cycle
Now that we have a fully working character, I have started experimenting with animating a walk cycle.
Skinning and Rigging the Character
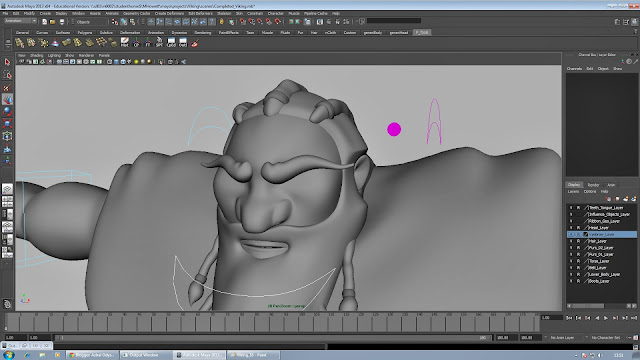
For our character I decided to make the Ribbon Spine, to allow more movement. I then built the skeleton and used Smooth Bind to attach it to the mesh. Using both the paint weights tool and the component editor, I adjusted the influences of the joints on each piece of the mesh until I had the character fully working.
After skinning the character I created all of the controls. I have now finished rigging and skinning the character.
I used joints to rig the eyebrows and blend shapes to add expressions to the face.
Subscribe to:
Comments (Atom)


